About
The Scheduled Cron Jobs module lists jobs that are scheduled explicitly or implicitly by other modules like Filesystem Backup. In contrast to Scheduled Commands which are executed just once, Scheduled Cron Jobs ar executed hourly, weekly or whateverly.
A Cron job is a Unix term for a command that is run on a regular schedule by the cron daemon. Each job is owned by a Unix user, and runs with the permissions of that user. Each has a set of minutes, hours, days, months and days of weeks on which it runs, allowing considerable flexibility in scheduling. For example, a job may run every 10 minutes, or at 3 am every day, or at 5pm Monday to Friday in January, February and march.
Cron jobs are very useful for performing regular system tasks, such as cleaning up log files, synchronizing the system type, backing up files and so on. Most Linux distributions will have several Cron jobs that were setup by default as part of the operating system install process for doing things like removing unneeded kernel modules, updating the database used by the locate command and rotating log files.
The actual Cron job configuration files are stored in different places, depending on whether they are part of a package included in your Linux distribution or created by a user. The /var/spool/cron directory is for jobs created manually by users, and contains one file per Unix user. The /etc/crontab file and the files under the /etc/cron.d directory contain jobs that are part of packages, such as those that are part of your distribution.
If a package like ‘anacron’ is used on the server a few more directories will be used by the cron system but most likely going unnoticed by Scheduled Cron Jobs.
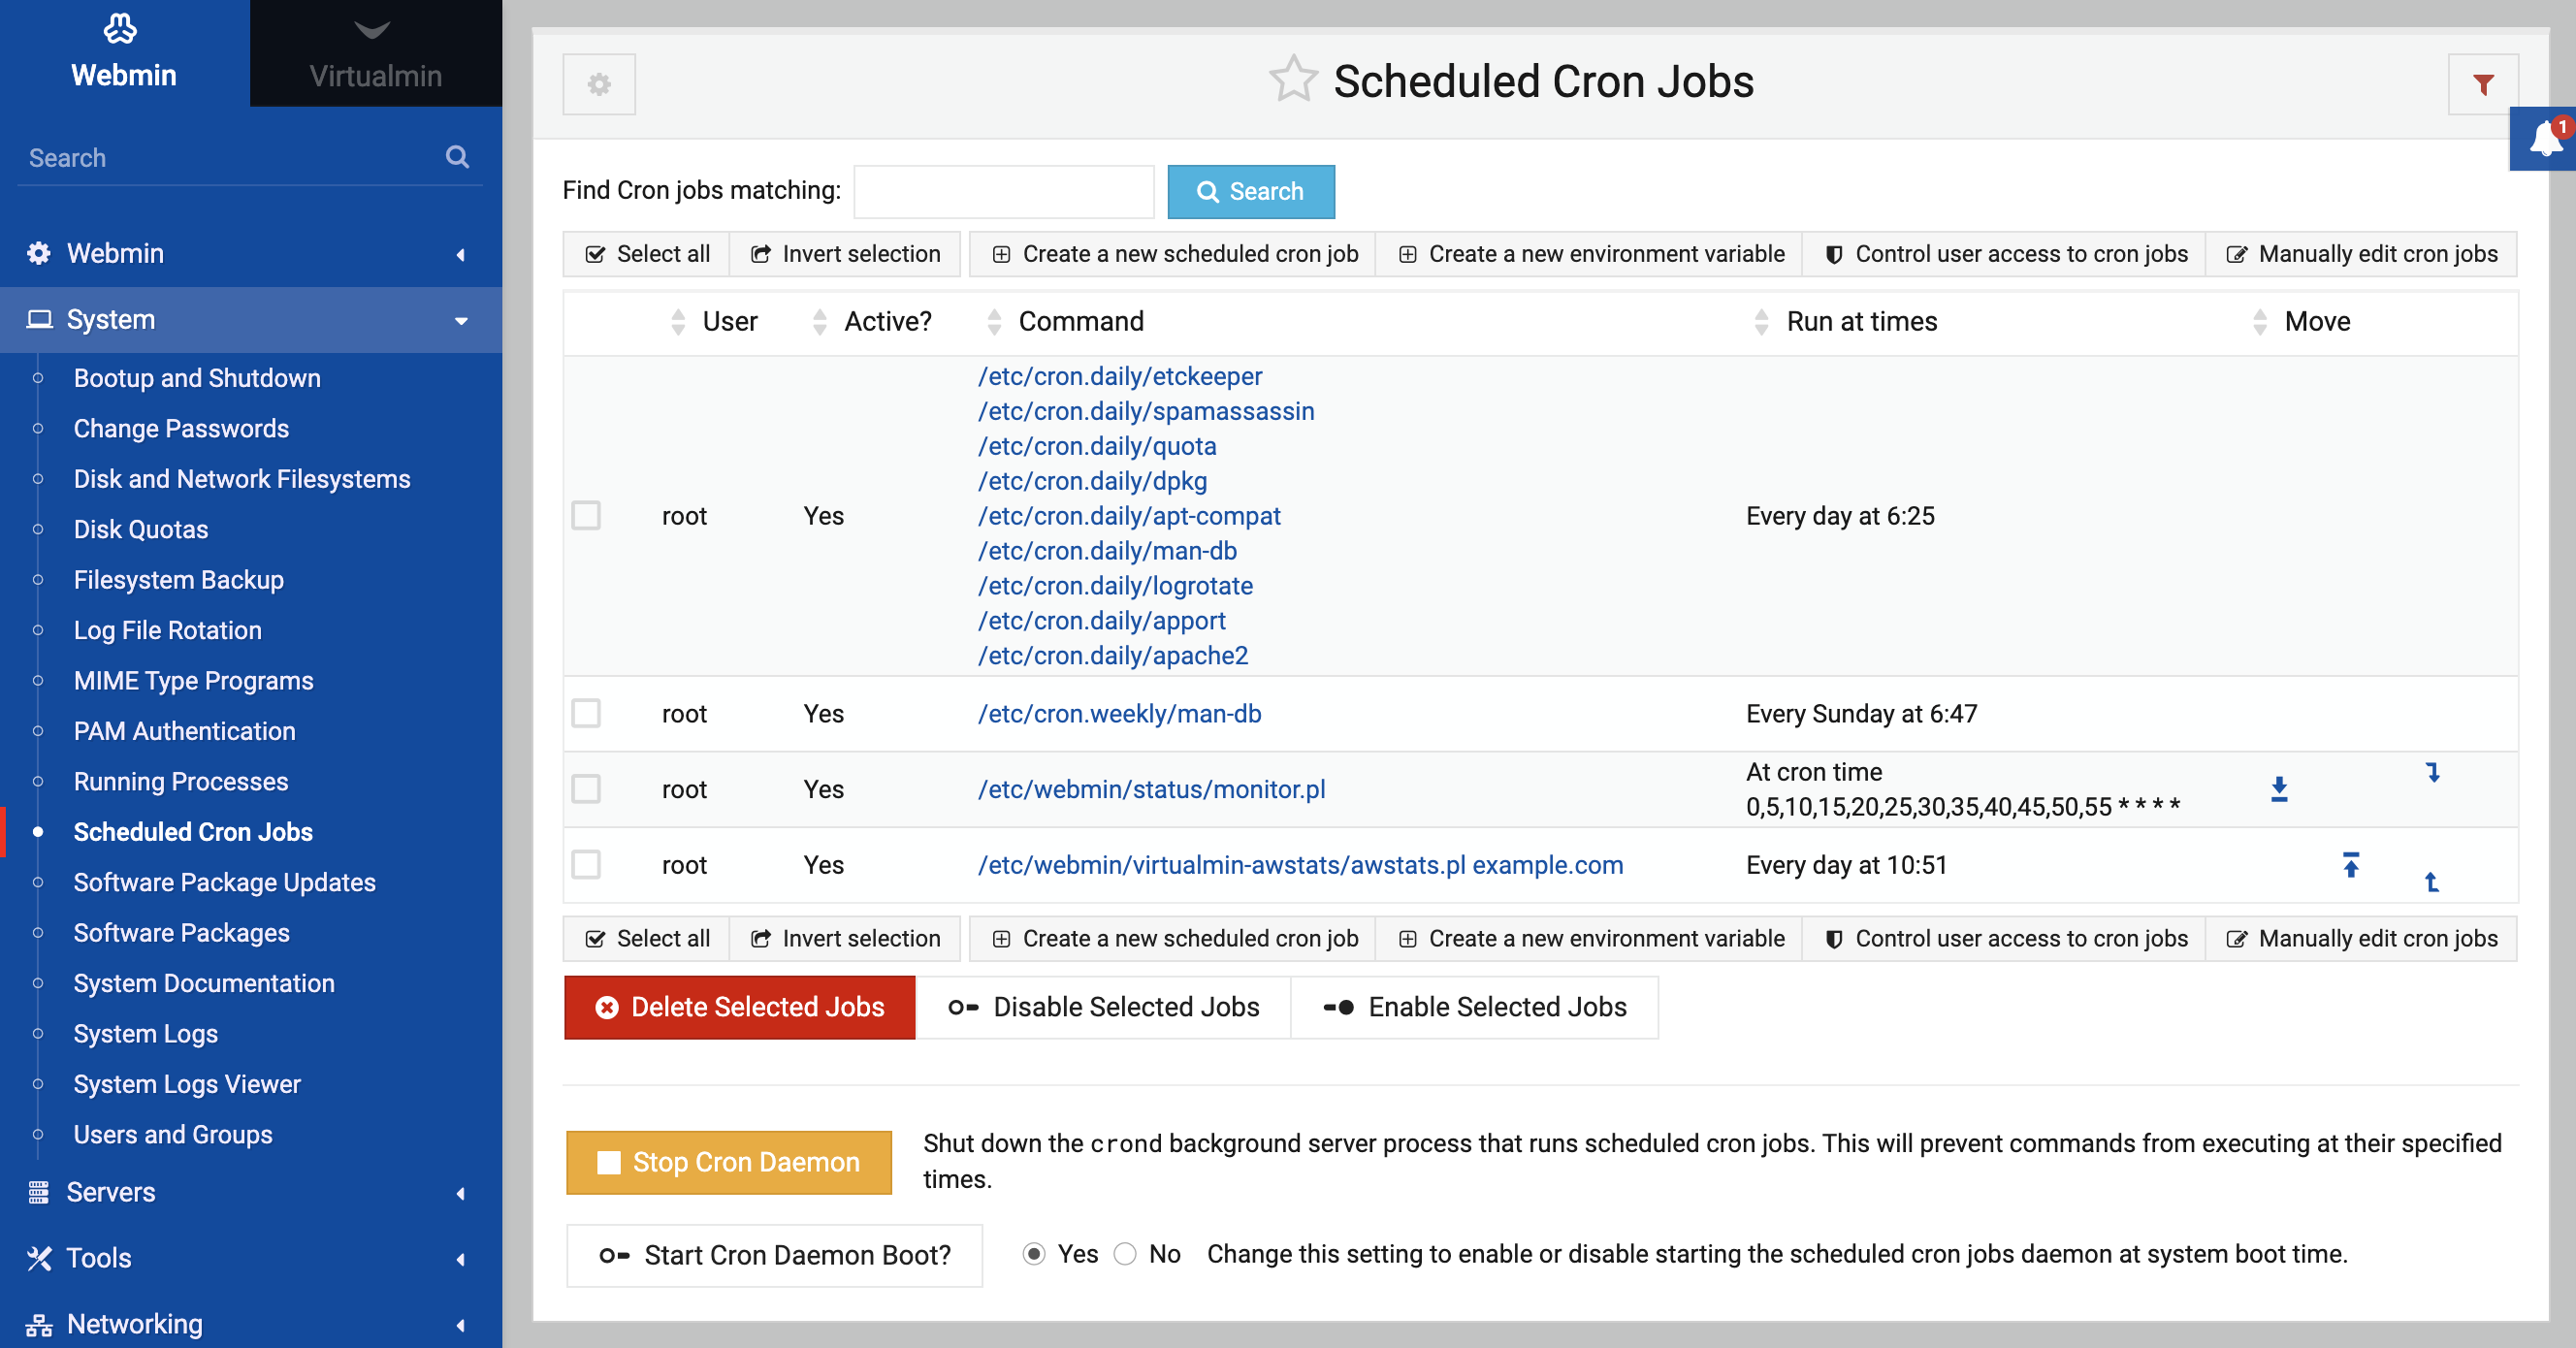
The Webmin module for editing Cron jobs can be found under the System category. When you enter it, the main page displays a table of all the existing jobs on your system as shown below. For each action, the owner, active status and command are listed. If the command for a job is too long, it will be truncated for display on the page.
Creating a new Cron job
Using Webmin, you can easily create a new Cron job that will execute as any Unix user on your system.
To steps to follow to achieve this are:
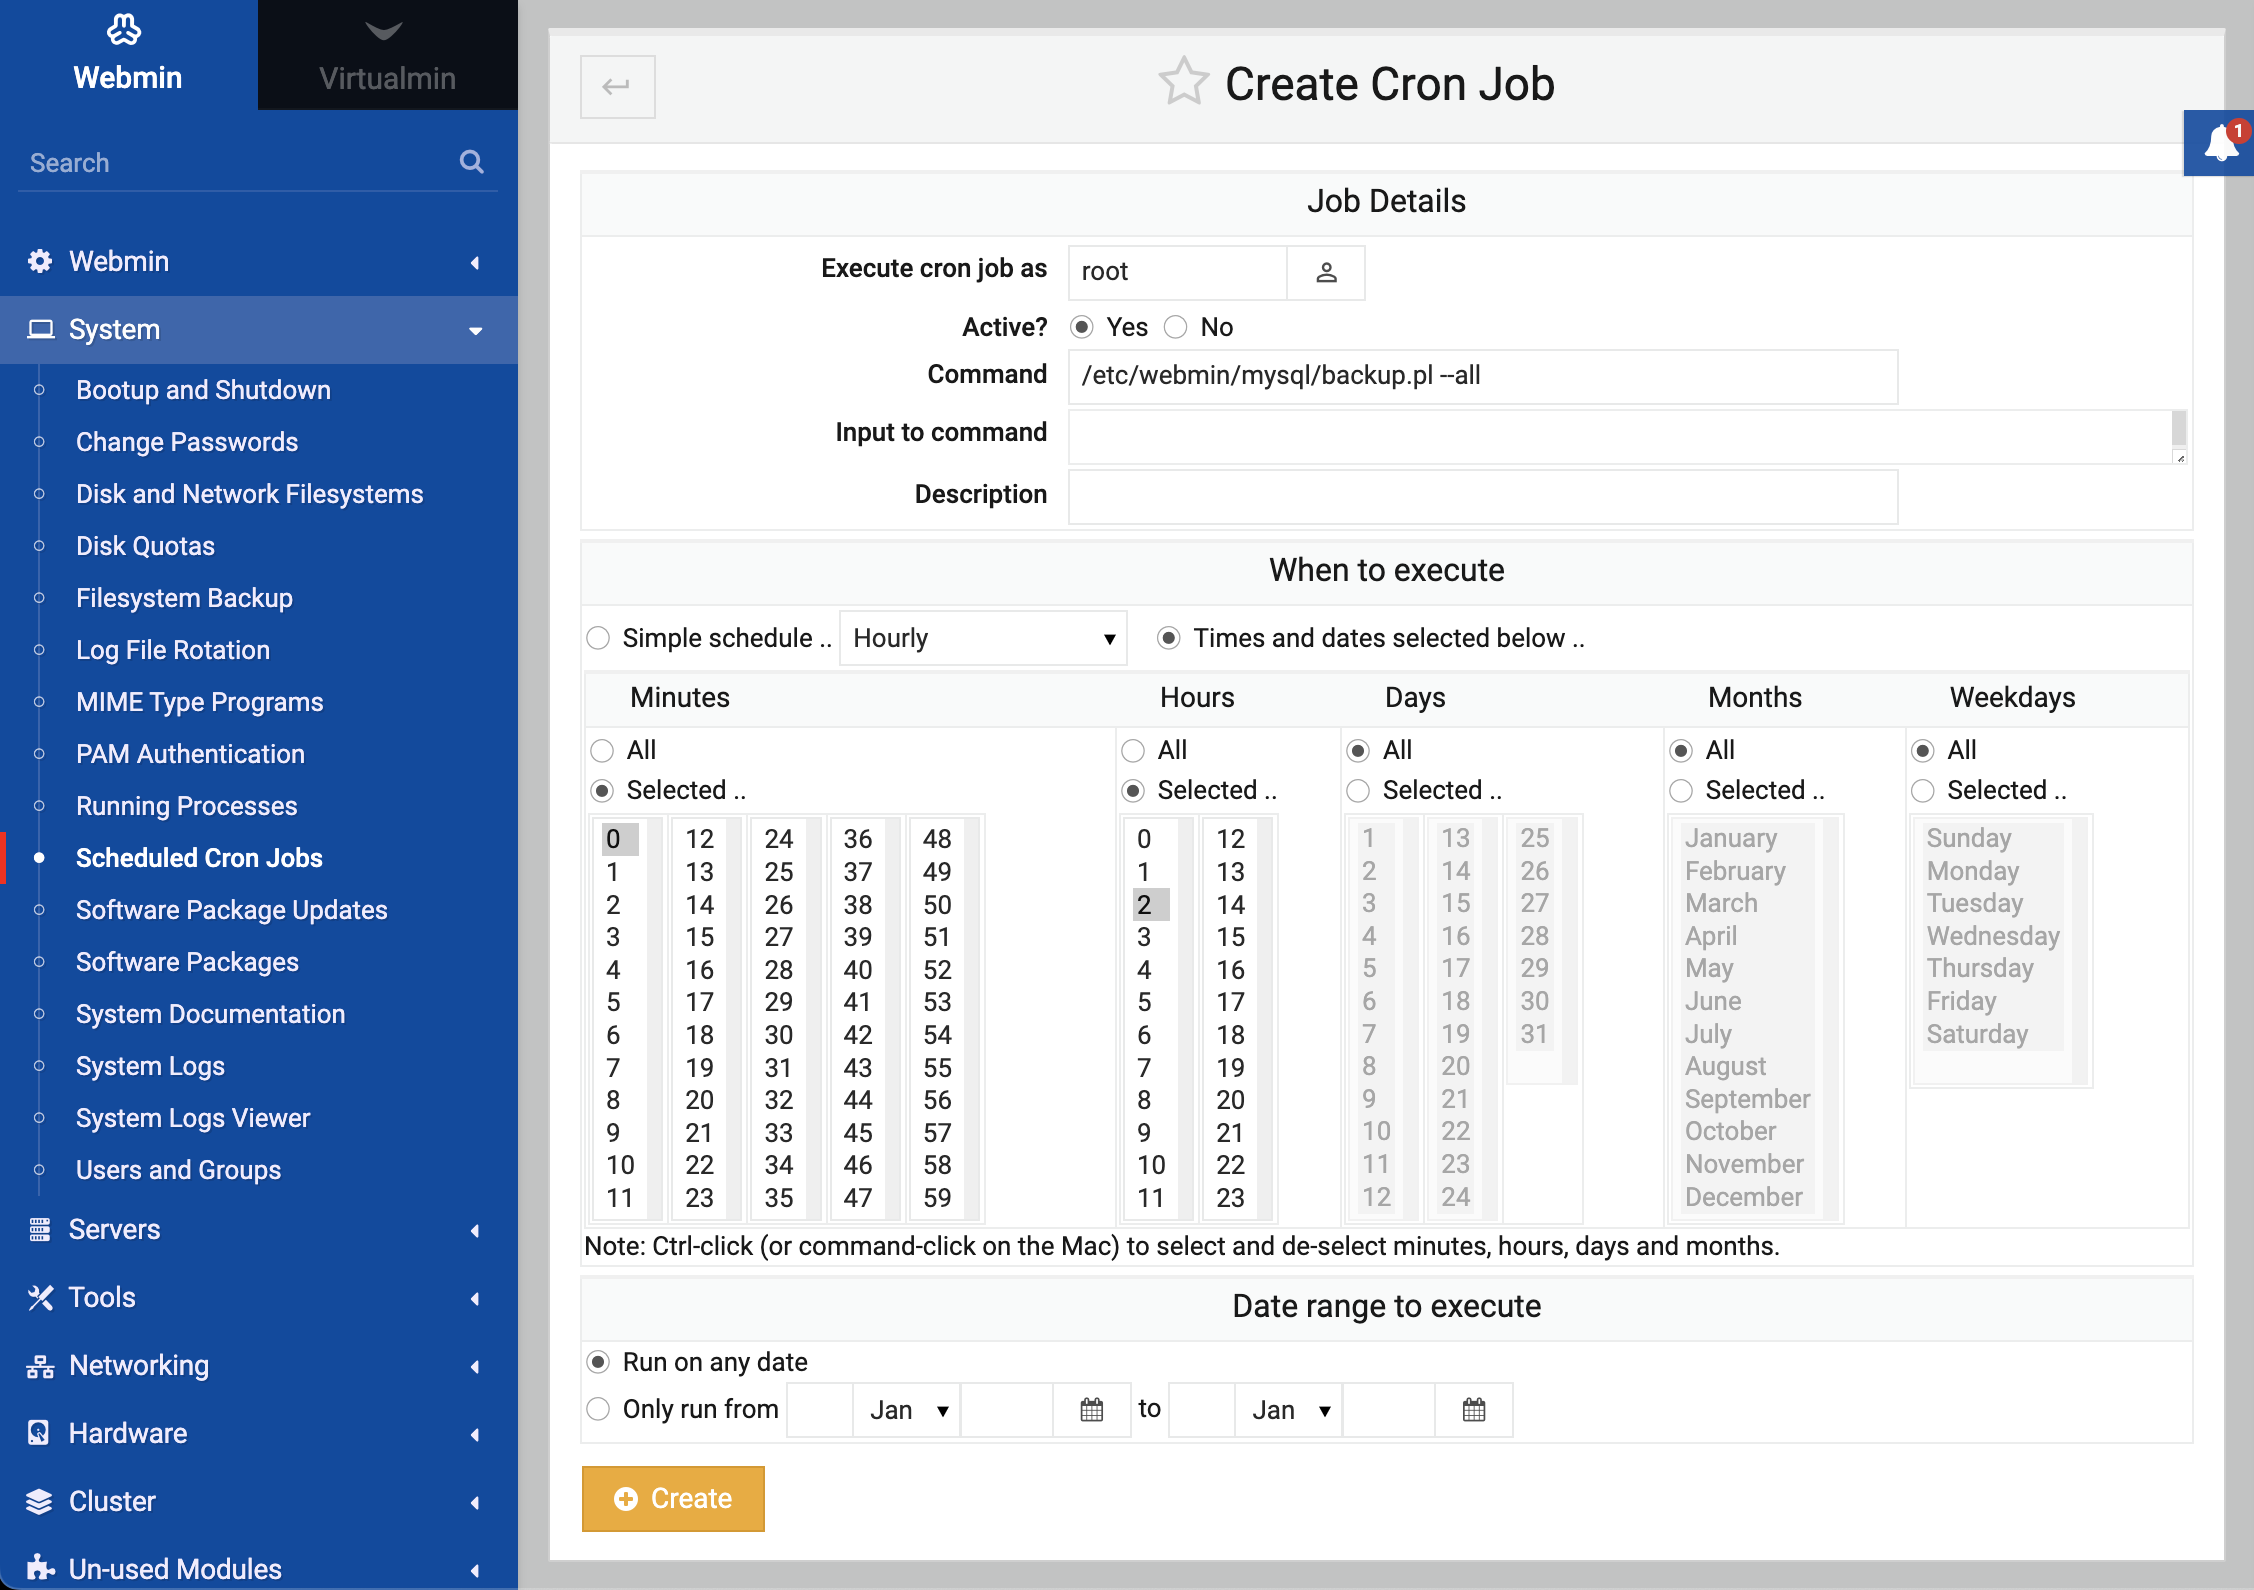
- On the main page of the module, click on the Create a new scheduled cron job link above or below the list of existing jobs. This will take you to the job creation form shown below.
- In the Execute cron job as field, enter the name of the Unix user you want the job to execute as. The command executed by the job will run in the user’s home directory with his full permissions.
- The Active? field can be set to No if you don’t want this new job to be actually executed. This is useful for creating jobs to be enabled at a later date.
- In the Command field, enter the shell commands that you want the Cron job to run. Just as at the shell prompt, multiple commands can be entered separated by
;, and all the normal shell operators such as<,>and&can be used. By default, any output from the command will be emailed to the owner of the Cron job. If you don’t want this to happen, make sure that output is redirected to a file or/dev/null. - Anything that you enter into the Input to command field will be fed to the command as input when it is run. If for example your command was mail
foo@bar.com, anything entered into the field would be sent to that email address. - In the When to execute section, choose the times and dates on which you want the command to execute. For each of the Minutes, Hours, Days, Months and Weekdays options you can choose multiple times or dates, or select the All option. For example:
- To have a job executed at 3:15am every Monday and Friday, change the Minutes option to Selected and select 15, change the Hours option to Selected and select 3, and the Weekdays option to Selected and select Monday and Friday. The Days and Months options would remain on All;
- To have a job executed every one minute. Change each Minutes, Hours, Days, Months and Weekdays options to All. The minimum is every one minute.
- Click the Create button to add the new Cron job. Assuming there are no errors in your selections, you will be returned to the main page of the module and your new job should appear next to its owner.
Editing a Cron job
Existing Cron jobs, including those created by users, through Webmin or included with your operating system, can be edited and re-scheduled using this module. Be careful when editing jobs that came as part of your distribution though, as some perform important tasks like truncating webserver, mail and login log files so that they do not use up all of your disk space. To edit an existing job, the steps to follow are:
- On the main page of the module, click on the command for the job that you want to edit. This will take you to the module editing form, which is similar to the image above.
- Change any of the details of the job, including the user, command, active status and execution times and dates.
- When done, click the Save button, and you will be returned to the main page of the module.
Existing Cron jobs can be deleted by following the steps above, but clicking the Delete button instead of Save. You can also force the immediately execution of a job by clicking the Run Now button on the edit page, which will execute the command and display any output that it produces.
Controlling users’ access to Cron
The Scheduled Cron Jobs module can also be used to control access to the crontab command by Unix users at the command line. This can be useful if you all un-trusted users to login to your system, and want to prevent some of them from setting up Cron jobs to run commands and take up CPU time when they are not logged in. Usually by default, all users will have the ability to create Cron jobs, but to change that the steps to follow are:
- At the bottom of the module’s main page, click on the Control user access to cron jobs link. This will take you to a form for entering the usernames of users who can or cannot use Cron.
- To grant access to all users, select the Allow all users option. To grant access to only some users, select the Allow only listed users option and enter their usernames into the text field. To give access to all except some users, select the Deny only listed users option and enter the usernames of the people that you want to deny access to into the text field.
- When done, click the Save button.
If a user has been denied access to Cron, you will no longer be able to use the module to create, edit or delete jobs belonging to him. However, existing jobs may continue to execute!
Module access control options
As described in Webmin Users, it is possible to use the Webmin Users module to control which Unix users a Webmin user can edit Cron jobs for. To set this up, you must first grant the user access to the module, then follow these steps:
- In the Webmin Users module, click on Scheduled Cron Jobs next to the name of the user that you want to restrict.
- Change the Can edit module configuration? field to No, so that the user cannot edit the commands that Webmin calls to create and edit jobs.
- Switch the Can edit cron jobs for field from All users to one of the other options. The most commonly used is Users with UID in range, which allows you to enter a minimum and maximum UID into the fields next to it. Never allow an un-trusted user access to the Cron jobs of system users like root or bin, as this will clearly give him full access to your system and so defeat any other Webmin access control.
- Set the Can control user access to cron? field to No, so that the Webmin user cannot stop users outside his control using Cron.
- Click the Save button at the bottom of the page to make the access control active.
Configuring the Scheduled Cron Jobs module
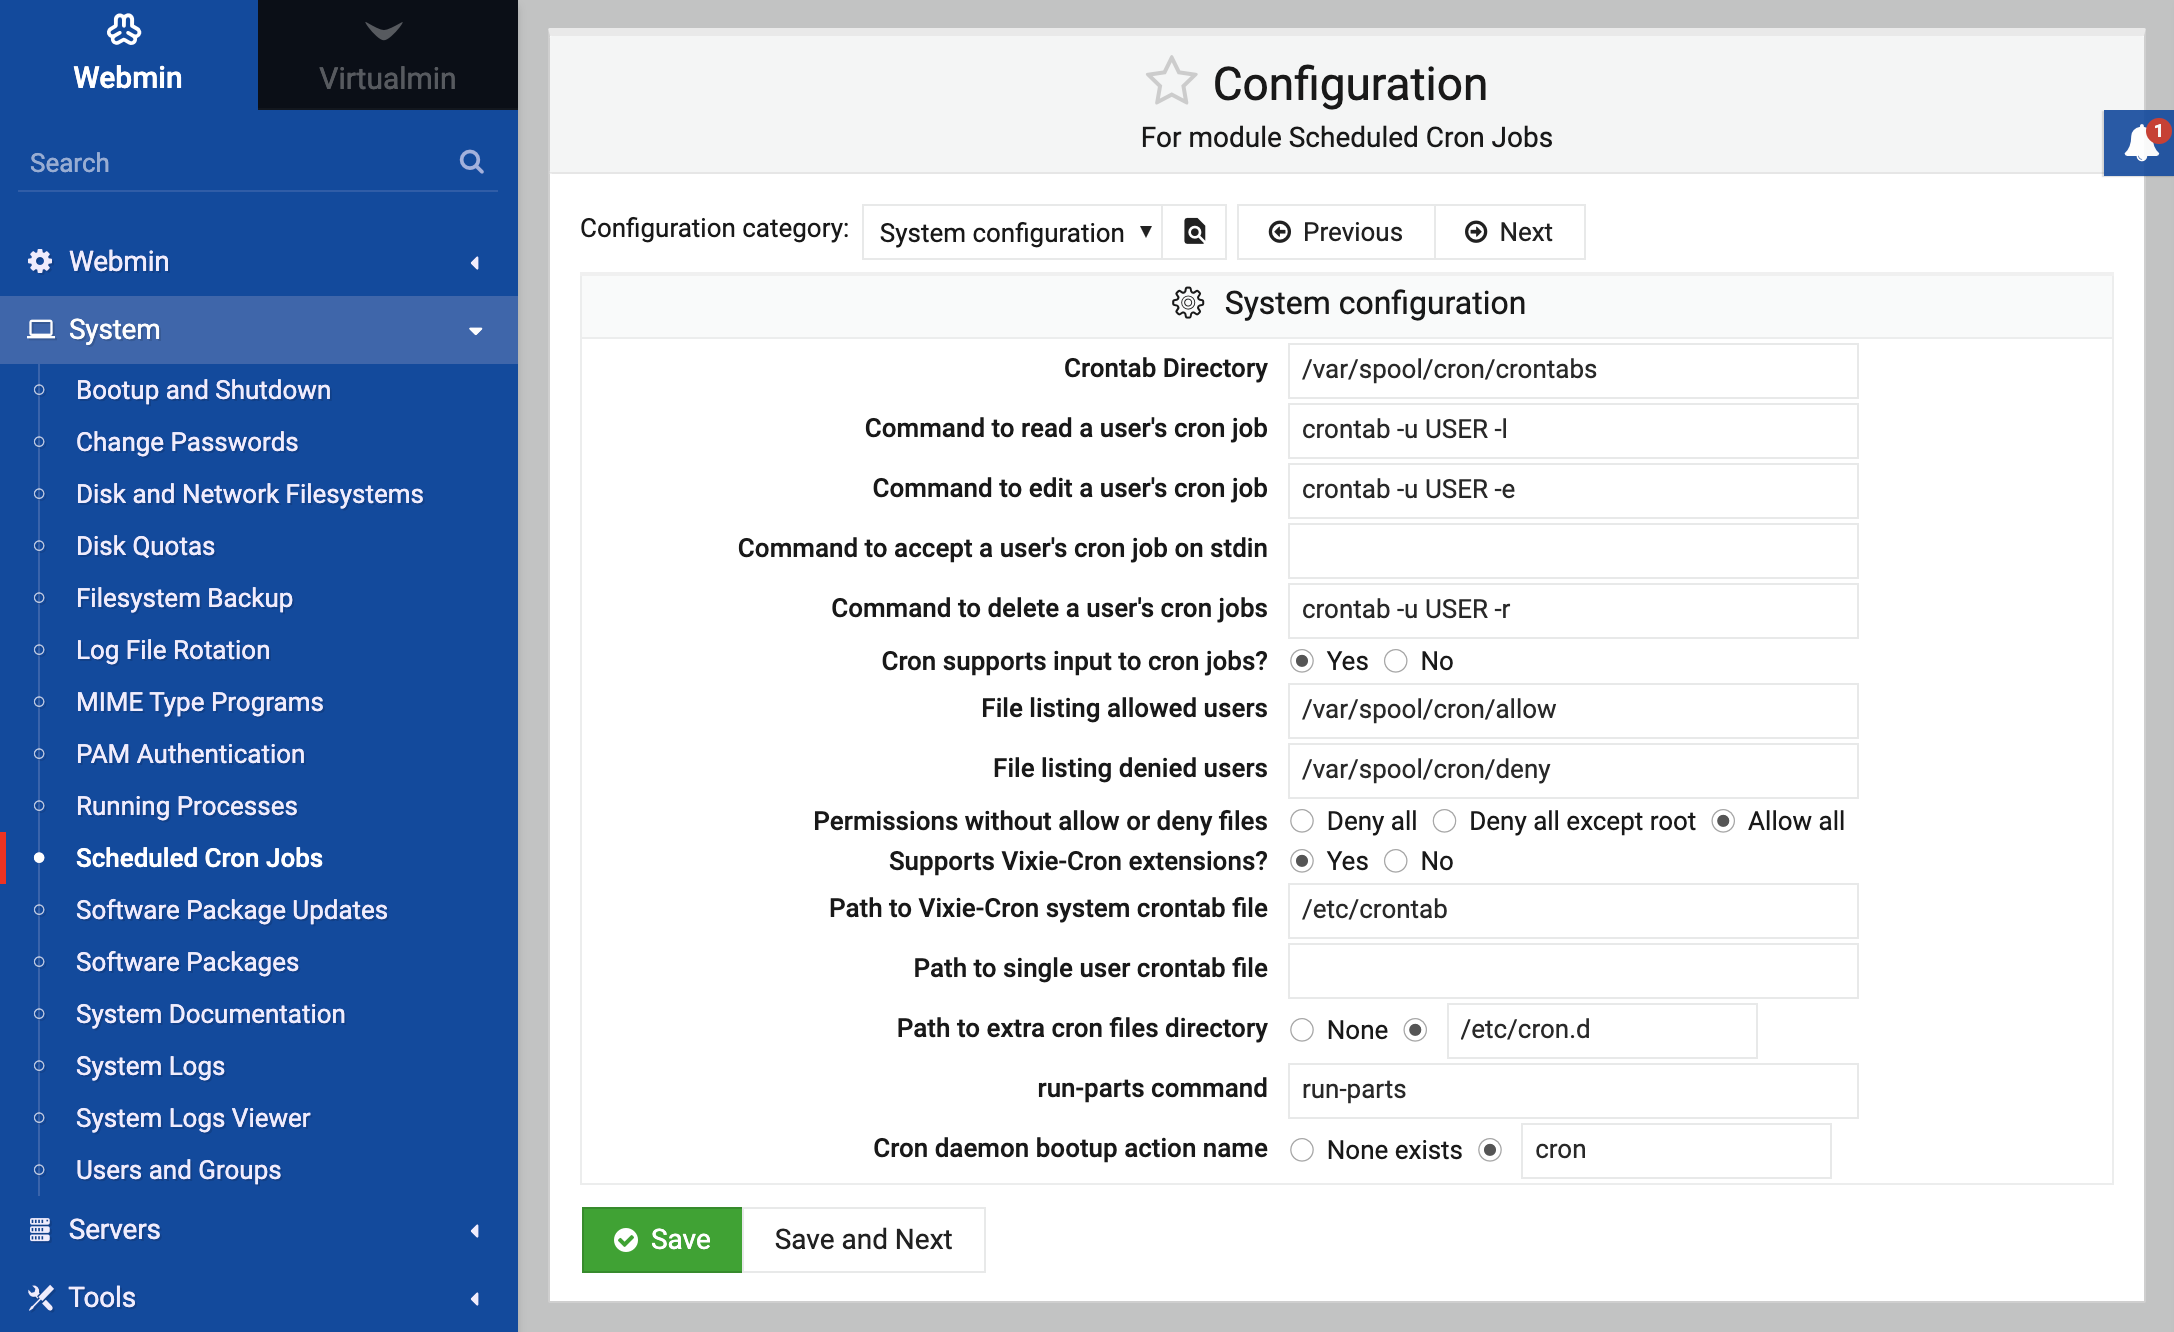
Most of the module settings that you can view by clicking on the Module Config link on the main page are set by default to match the installed operating system, and vary rarely need to be changed. However, there is one field that effects the module’s user interface, shown in the table below:
Other operating systems
Cron is available on almost all Unix systems, with very similar capabilities. That means that this module appears almost identical on all operating systems, with only a couple of minor differences. On some, there is no Input to command field available for when creating or editing a job. On others, when controlling which users have access to Cron the default Allow all users option will be replaced with Allow all users except root or Deny all users.
Internally, other operating systems use different directories for storing Cron jobs - Solaris for example uses /var/spool/cron/crontabs instead of /var/spool/cron on Linux. Most other systems do not
have an /etc/crontab file or /etc/cron.d directory either. However, when using Webmin you do not have to bother about these differences, as it knows about the paths used by other Unix variants and displays all Cron jobs using the same interface, no matter which file they are stored in.


